How to make a key hole cut on wooden plaque
Step by Step
- Research router drills
- Watch YouTube videos on how to make a key hole cut in wood
–Katie’s corner Learning to route keyholes
–How to make a universal keyhole jig
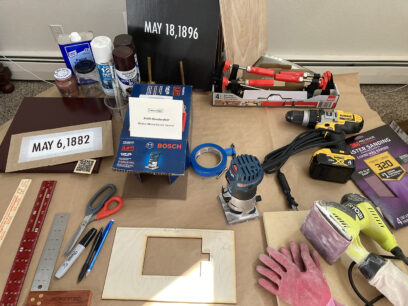
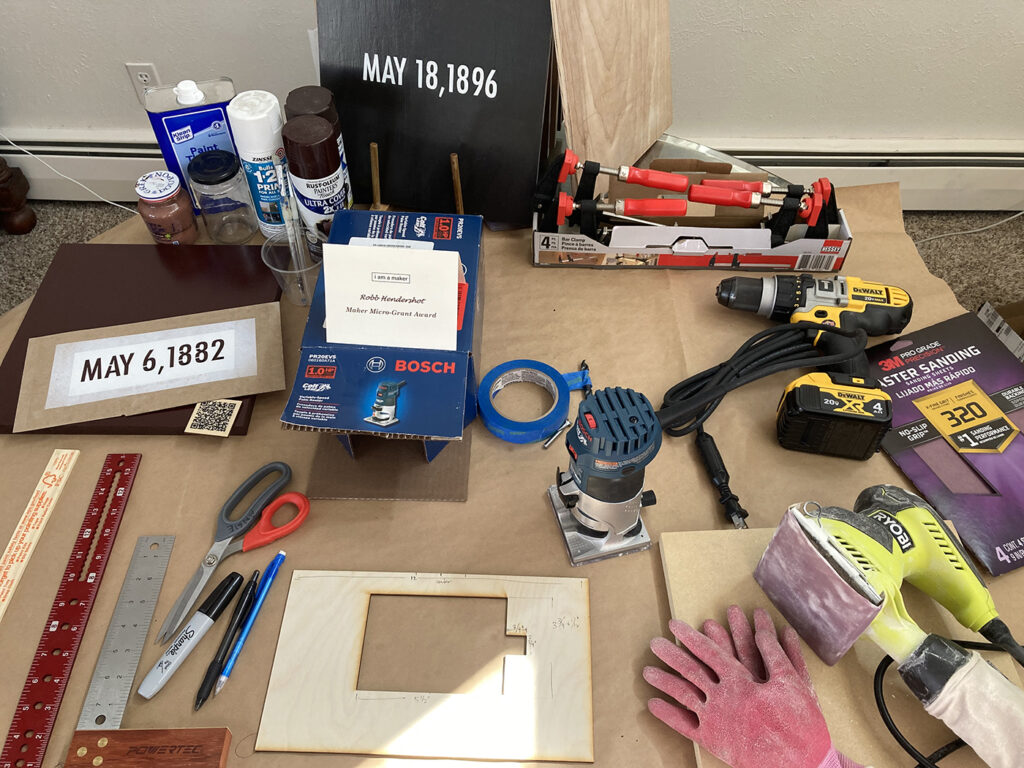
–How to use the Bosch palm router - Make a list of equipment
- Prepare illustrator file to get a jig made
- Get a jig made from a laser cutter at the BLDG61 lab at the Boulder County Library
- Buy 4′ x 8′ particle board and get cut in 12″ x 12″ squares
- Sand board
- Paint board
- Sand board with 320 sand paper
- Paint board
- Measure out where to put holes on board
- Drill 2 holes for the beginning and end of the keyhole
- route from hole to hole
- Sand
- Paint
- Varnish
- Finished!
Materials List
-wood for 32 plaques
-rulers
-pencil
-sandpaper 220/320/440
-palm router
-bit for cuts
-drill
-clamps
-jig
-electric sander
-gloves
-scissors
-stencil for dates
-paint different hues
-varnish
-paintbrushes
-empty jars
-brush cleaner
-file holders – to hold paintings
-newspaper
-painters tape
-tack cloth
-sponge
-rags
_extension cable
-work table
Video of learning to make a keyhole cut
Project goals
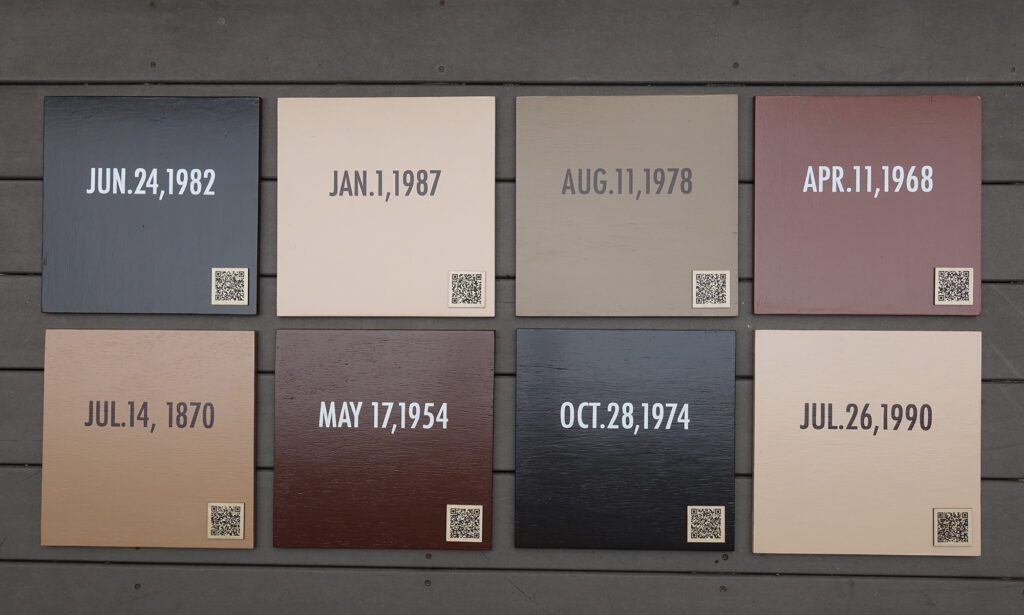
My goal was to make keyhole cuts in 36 wooden plaques for an art project called ‘Right on!’ Each plaque is painted skin-toned colors and has a date of a landmark civil rights case. I wanted the plaques to hang flush on the wall for the Maker grant rather than have hooks. I wanted to learn how to do this since it would be useful for other art projects. Part of the project goal was also to acquire basic materials for future wood-working projects.
Road blocks
Living in an apartment with no garage is a challenge if you want to learn to do woodworking projects. I have a backyard, but it is also difficult to get 2 good warm days ~ 60 degrees to do the sanding, painting, drying, and woodwork. I only had 1/2 day to do a test, and it seems I really need 2 full days to practice. Also, I had no workbench! I first needed to get a portable work table and one I could put away. Once I had the wooden folding table and a warm day, I could do the test. The only problem my backyard patio had a mound of snow, and I had to set up the table on the grass. Not the sturdiest surfaces to put a work table on!
The plaques that I had already painted (24) were too thin 1/2″ thick to use the router. It takes about 10 hours per plaque, so this would be a lot of work to redo all of the plaques. I bought thicker wood 1″ to do the keyhole cuts. Even with the thicker wood, it is tricky to drill a shallow hole, even marking the drill with tape. I tried 2x successfully to do the keyhole cuts. I accidentally drilled a hole right through the 1″ painted board, and the 1/2″ painted board. Even with the jig, it takes some practice to press the palm router against the jig not to move a millimeter. Hence, I need to practice maybe 20 times before doing it on the artwork.
Surprises
Woodworking tools are fairly inexpensive compared to electronic tools. However, if you are just starting out you need a lot of little things that add up. To do this one simple project to make keyholes in 32 12″ x 12″ painted plaques cost ~ $500 (includes the entire list above) not including the drill. Also, it looks as easy and simple as drilling holes, but in fact I learned quickly that learning to drill the initial holes a certain depth to the 1/8″ is really hard, holding it snug against the jig while going across takes practice, and everything works really well if you have the right conditions (weather, space, furniture)
Tips or tricks
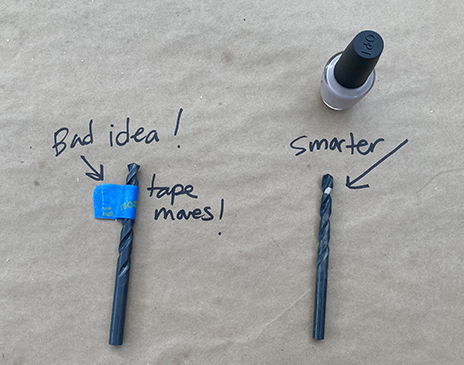
Marking the drill bit
The tip to put tape on the drill where one should stop was a bad idea. For one, if you use painter’s tape, it slides easily. Secondly, if you use tackier tape, it sticks its paint to clean off. I didn’t do this yet, but I think white-out or light nail polish would be better.
Marking the holes to drill
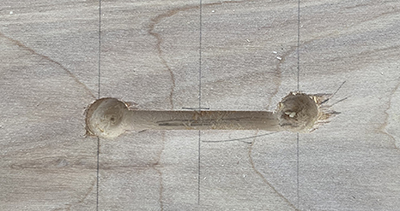
Marking the hole for drilling. I marked the centers where I should drill a hole, and that was not so accurate. I should have marked the top of the hole and drew a line so my eye could also gauge it if it is straight. The middle picture shows how the holes are crooked.
Pulling the palm router straight out.
When I pulled the palm router out, it easily slid on the way out. However, I couldn’t pull the palm router out if I turned it off before pulling it up.
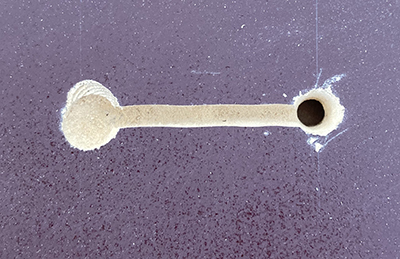
In the third picture, you see how it slid. Also, you see the hole on the right where I accidentally drilled all the way through the board! With only 1″ thickness, this is easy to do. It is even easier with a 1/2″ board where I literally only have 1/8″ from the front surface. That is for experts, not beginners!
Practice!
I have a pretty sturdy hand with my video camera, but not with a palm router drill. I practiced 3x before doing it on a finished artwork that took me 10 hours to paint 1 plaque. I ruined it. So before I do the other 32 plaques, I will practice until I have the keyhole perfect! You can see in images 2 and image 3 that my line is wobbly, and I need to press it against the jig while pulling it across.
Thanks, I am a Maker for the micro-grant to learn this new skill!